Showing posts with label Holiday treats. Show all posts

Wednesday, December 16, 2009

Two-Tone Fudge Brownies


If you've read my previous post, you all know that I'm in love with cookie dough! Now that I have discovered that you don't always need to bake cookie dough, I try to find a way to enjoy it without having to bake it all. This amazing brownie recipe comes from my favorite cooking magazine "Taste of Home". The brownies are fudgy and moist like cake which is the way I like brownies. My husband loves thick and chewy brownies and many of you are probably like him, too. But I'll tell you, you won't be disappointed with these brownie cakes. The cookie dough on top of them is definitely the highlight of this dessert. They make enough to feed a crowd and of course, everyone loves these brownies... How can they not?


Two-Tone Fudge Brownies
Adapted from "Taste of Home"

Printable Recipe

Ingredients:

1 cup (6 ounces) semisweet chocolate chips
1/2 cup butter or margarine, softened
1 cup sugar
3 eggs
1 teaspoon vanilla extract
1 1/4 cups all-purpose flour
1/4 teaspoon baking soda
(Optional) 3/4 cup chopped walnuts

Cookie Dough Layer:
1/2 cup butter or margarine, softened
1/2 cup packed brown sugar
1/4 cup sugar
3 tablespoons milk
1 teaspoon vanilla extract
1 cup all-purpose flour
1 cup (6 ounces) semisweet chocoate chips

Direction:

In a microwave-safe bowl, melt chocolate chips. Cool slightly. in a mixing bowl, cream butter and sugar. Add eggs and vanilla; mix well. Stir in melted chocolate. Combine flour and baking soda add to batter. Stir in walnuts.

Spread into a greased 13-in. x 9-in. x 2-in. baking pan. Bake at 350 degrees F for 16-22 minutes or until a toothpick inserted near the center comes out clean. Cool on a wire rack.

In a mixing bowl, cream butter and sugar. Beat in milk and vanilla. Gradually add flour. Stir in chocolate chips. Drop by ablespoonfuls over cooled brownies; carefully spread over top. Cut into squares. Store in the refrigerator.

Yield: 4 dozen.

* Cookie dough layer is not baked and does not contain eggs.

Sook the Cook

Two-Tone Fudge Brownies


If you've read my previous post, you all know that I'm in love with cookie dough! Now that I have discovered that you don't always need to bake cookie dough, I try to find a way to enjoy it without having to bake it all. This amazing brownie recipe comes from my favorite cooking magazine "Taste of Home". The brownies are fudgy and moist like cake which is the way I like brownies. My husband loves thick and chewy brownies and many of you are probably like him, too. But I'll tell you, you won't be disappointed with these brownie cakes. The cookie dough on top of them is definitely the highlight of this dessert. They make enough to feed a crowd and of course, everyone loves these brownies... How can they not?


Two-Tone Fudge Brownies
Adapted from "Taste of Home"

Printable Recipe

Ingredients:

1 cup (6 ounces) semisweet chocolate chips
1/2 cup butter or margarine, softened
1 cup sugar
3 eggs
1 teaspoon vanilla extract
1 1/4 cups all-purpose flour
1/4 teaspoon baking soda
(Optional) 3/4 cup chopped walnuts

Cookie Dough Layer:
1/2 cup butter or margarine, softened
1/2 cup packed brown sugar
1/4 cup sugar
3 tablespoons milk
1 teaspoon vanilla extract
1 cup all-purpose flour
1 cup (6 ounces) semisweet chocoate chips

Direction:

In a microwave-safe bowl, melt chocolate chips. Cool slightly. in a mixing bowl, cream butter and sugar. Add eggs and vanilla; mix well. Stir in melted chocolate. Combine flour and baking soda add to batter. Stir in walnuts.

Spread into a greased 13-in. x 9-in. x 2-in. baking pan. Bake at 350 degrees F for 16-22 minutes or until a toothpick inserted near the center comes out clean. Cool on a wire rack.

In a mixing bowl, cream butter and sugar. Beat in milk and vanilla. Gradually add flour. Stir in chocolate chips. Drop by ablespoonfuls over cooled brownies; carefully spread over top. Cut into squares. Store in the refrigerator.

Yield: 4 dozen.

* Cookie dough layer is not baked and does not contain eggs.

Sook the Cook

Two-Tone Fudge Brownies


If you've read my previous post, you all know that I'm in love with cookie dough! Now that I have discovered that you don't always need to bake cookie dough, I try to find a way to enjoy it without having to bake it all. This amazing brownie recipe comes from my favorite cooking magazine "Taste of Home". The brownies are fudgy and moist like cake which is the way I like brownies. My husband loves thick and chewy brownies and many of you are probably like him, too. But I'll tell you, you won't be disappointed with these brownie cakes. The cookie dough on top of them is definitely the highlight of this dessert. They make enough to feed a crowd and of course, everyone loves these brownies... How can they not?


Two-Tone Fudge Brownies
Adapted from "Taste of Home"

Printable Recipe

Ingredients:

1 cup (6 ounces) semisweet chocolate chips
1/2 cup butter or margarine, softened
1 cup sugar
3 eggs
1 teaspoon vanilla extract
1 1/4 cups all-purpose flour
1/4 teaspoon baking soda
(Optional) 3/4 cup chopped walnuts

Cookie Dough Layer:
1/2 cup butter or margarine, softened
1/2 cup packed brown sugar
1/4 cup sugar
3 tablespoons milk
1 teaspoon vanilla extract
1 cup all-purpose flour
1 cup (6 ounces) semisweet chocoate chips

Direction:

In a microwave-safe bowl, melt chocolate chips. Cool slightly. in a mixing bowl, cream butter and sugar. Add eggs and vanilla; mix well. Stir in melted chocolate. Combine flour and baking soda add to batter. Stir in walnuts.

Spread into a greased 13-in. x 9-in. x 2-in. baking pan. Bake at 350 degrees F for 16-22 minutes or until a toothpick inserted near the center comes out clean. Cool on a wire rack.

In a mixing bowl, cream butter and sugar. Beat in milk and vanilla. Gradually add flour. Stir in chocolate chips. Drop by ablespoonfuls over cooled brownies; carefully spread over top. Cut into squares. Store in the refrigerator.

Yield: 4 dozen.

* Cookie dough layer is not baked and does not contain eggs.

Sook the Cook

Tuesday, December 15, 2009

Cookie Dough Truffles

Yum. Yum. Yum! Do you like cookie dough? I do! I love it! Whenever I make chocolate chip cookies, I just have to have a bite of cookie dough. I know, raw eggs... Yikes! Well, that's just risk I'm willing to take, I guess. Okay, so these cookie dough truffles? I'll tell you. No raw eggs whatsoever! So no worries there. And it tastes just like normal cookie dough. The secret ingredient is a can of sweetened condensed milk. Oh it gives such a great flavor to these delectible truffles! I love making these because they are different from normal creamy chocolate truffles although I love those too! My mother-in-law has the best truffle recipe but unfortunately it is a family secret recipe so she will probably kill me if I shared it with you all on here... Anyway, back to these cookie dough truffles: They are very easy to make. I'd definitely use dipping chocolate to dip the cookie dough. I've tried using normal melted semisweet chocolate chips... Well, it works but not very pretty. This recipe won the Grand Prize on "Taste of Home" magazine back in Jan 2005. So you know it's good. :)


Cookie Dough Truffles
Adapted from "Taste of Home"

Printable Recipe

Ingredients:

1/2 cup butter, softened
3/4 cup packed brown sugar
2 cups all-purpose flour (*You may need more flour than this. I added about 1/4 cup more because the dough was a little too sticky.)
1 can (14 ounces) sweetened condensed milk
1 teaspoon vanilla extract
1/2 cup miniature semisweet chocolate chips (*I used normal size chocolate chips)
(Optional) 1/2 cup chopped walnuts
1 1/2 pounds semisweet chocolate candy coating, chopped or dipping chocolate

Directions:

In a mixing bowl, cream the butter and brown sugar until light and fluffy. Add the flour, milk and vanilla; mix well. Stir in the chocolate chips and walnuts. Shape into 1-in. balls; place on waxed paper-lined baking sheets. Loosely cover and refriderate for 1-2 hours or until firm. (*I put them in the freezer for about 40 minutes and that worked well, too.)

In a mixrowave-safe bowl, melt candy coating, stirring often until smooth. Dip balls in coating; place on waxed paper-lined baing sheets. Refrigerate until firm, about 15 minutes. If desired, remelt remaining candy coating and drizzle over candies. Store in the refrigerator.

Sook the Cook

Cookie Dough Truffles

Yum. Yum. Yum! Do you like cookie dough? I do! I love it! Whenever I make chocolate chip cookies, I just have to have a bite of cookie dough. I know, raw eggs... Yikes! Well, that's just risk I'm willing to take, I guess. Okay, so these cookie dough truffles? I'll tell you. No raw eggs whatsoever! So no worries there. And it tastes just like normal cookie dough. The secret ingredient is a can of sweetened condensed milk. Oh it gives such a great flavor to these delectible truffles! I love making these because they are different from normal creamy chocolate truffles although I love those too! My mother-in-law has the best truffle recipe but unfortunately it is a family secret recipe so she will probably kill me if I shared it with you all on here... Anyway, back to these cookie dough truffles: They are very easy to make. I'd definitely use dipping chocolate to dip the cookie dough. I've tried using normal melted semisweet chocolate chips... Well, it works but not very pretty. This recipe won the Grand Prize on "Taste of Home" magazine back in Jan 2005. So you know it's good. :)


Cookie Dough Truffles
Adapted from "Taste of Home"

Printable Recipe

Ingredients:

1/2 cup butter, softened
3/4 cup packed brown sugar
2 cups all-purpose flour (*You may need more flour than this. I added about 1/4 cup more because the dough was a little too sticky.)
1 can (14 ounces) sweetened condensed milk
1 teaspoon vanilla extract
1/2 cup miniature semisweet chocolate chips (*I used normal size chocolate chips)
(Optional) 1/2 cup chopped walnuts
1 1/2 pounds semisweet chocolate candy coating, chopped or dipping chocolate

Directions:

In a mixing bowl, cream the butter and brown sugar until light and fluffy. Add the flour, milk and vanilla; mix well. Stir in the chocolate chips and walnuts. Shape into 1-in. balls; place on waxed paper-lined baking sheets. Loosely cover and refriderate for 1-2 hours or until firm. (*I put them in the freezer for about 40 minutes and that worked well, too.)

In a mixrowave-safe bowl, melt candy coating, stirring often until smooth. Dip balls in coating; place on waxed paper-lined baing sheets. Refrigerate until firm, about 15 minutes. If desired, remelt remaining candy coating and drizzle over candies. Store in the refrigerator.

Sook the Cook

Cookie Dough Truffles

Yum. Yum. Yum! Do you like cookie dough? I do! I love it! Whenever I make chocolate chip cookies, I just have to have a bite of cookie dough. I know, raw eggs... Yikes! Well, that's just risk I'm willing to take, I guess. Okay, so these cookie dough truffles? I'll tell you. No raw eggs whatsoever! So no worries there. And it tastes just like normal cookie dough. The secret ingredient is a can of sweetened condensed milk. Oh it gives such a great flavor to these delectible truffles! I love making these because they are different from normal creamy chocolate truffles although I love those too! My mother-in-law has the best truffle recipe but unfortunately it is a family secret recipe so she will probably kill me if I shared it with you all on here... Anyway, back to these cookie dough truffles: They are very easy to make. I'd definitely use dipping chocolate to dip the cookie dough. I've tried using normal melted semisweet chocolate chips... Well, it works but not very pretty. This recipe won the Grand Prize on "Taste of Home" magazine back in Jan 2005. So you know it's good. :)


Cookie Dough Truffles
Adapted from "Taste of Home"

Printable Recipe

Ingredients:

1/2 cup butter, softened
3/4 cup packed brown sugar
2 cups all-purpose flour (*You may need more flour than this. I added about 1/4 cup more because the dough was a little too sticky.)
1 can (14 ounces) sweetened condensed milk
1 teaspoon vanilla extract
1/2 cup miniature semisweet chocolate chips (*I used normal size chocolate chips)
(Optional) 1/2 cup chopped walnuts
1 1/2 pounds semisweet chocolate candy coating, chopped or dipping chocolate

Directions:

In a mixing bowl, cream the butter and brown sugar until light and fluffy. Add the flour, milk and vanilla; mix well. Stir in the chocolate chips and walnuts. Shape into 1-in. balls; place on waxed paper-lined baking sheets. Loosely cover and refriderate for 1-2 hours or until firm. (*I put them in the freezer for about 40 minutes and that worked well, too.)

In a mixrowave-safe bowl, melt candy coating, stirring often until smooth. Dip balls in coating; place on waxed paper-lined baing sheets. Refrigerate until firm, about 15 minutes. If desired, remelt remaining candy coating and drizzle over candies. Store in the refrigerator.

Sook the Cook

Monday, December 14, 2009

Christmas Treats for you! Let's start out with some Fudge...

This last weekend was just crazy! Let me tell you what I was up to this weekend, starting Friday. So there's something you should know about me. I. Hate. Shopping. You read it right. I really do hate shopping. You'll know I'm telling you the truth when you see my closet. I don't really have a lot of clothes or shoes or cute jewelry. If there is one thing that I don't like about holiday seasons, it would be shopping for Christmas. So I put it off and put it off and finally went to the mall and got some presents for my hub and cub. I don't think I even have any money left for groceries.... I guess we'll just have to eat bread and drink lots of water...


On Saturday, I went and got all the ingredients I needed for treats... This year, I'm not doing gifts for anyone  other than my hub and cub. Well, not "buying" gifts is more correct. So I decided to make treats for friends and family. I must have made about 6 different kinds of treats. I made 10 plateful treats and some more for hub's work. So silly me, I thought making those treats won't be too much work... Boy, was I wrong?? I ended up staying up until 2:30 am finishing up all the stuff! I was exhausted from baking and making fudge and dipping truffles all day and all night! I now have a new respect for bakers. Gosh, I'm not so sure if I will ever be able to bake standing up all day. I'd die!
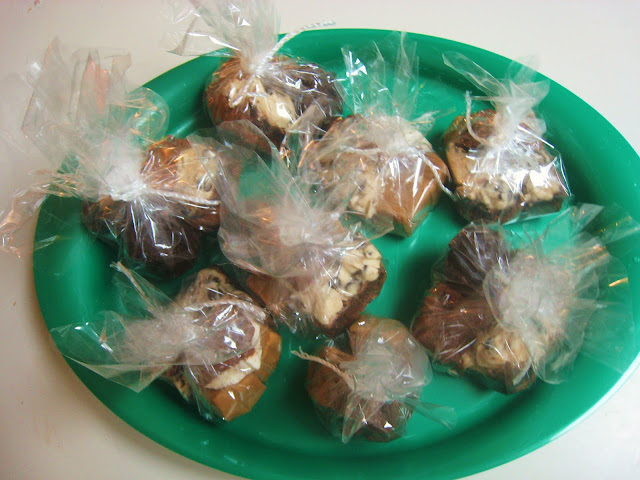

Okay, no more whining, I promise. Today, I delivered all the plates to my friends and family. Some I barely know, some I'm close with, family with wild teenagers with crazy appetite (they got two plates thank goodness). Just driving around the town delivering the plates took us about 2 hours! Crazy, huh? But I loved it! It was actually my favorite part about all this experience! It was so wonderful to see their faces light up as they saw the treats. It was definitely worth staying up late making all those sweets!

 Today, I would like to share with you some fudge recipes that I made. I made four different kinds. They are super easy to make them. If I'd known how easy it was to make, I would've made it way more often!


Please click on the pictures for printable recipes. These fudges were fantastic! The first recipe, "Peanut Butter Fudge" is amazing in its simplicity of ingredients and directions. The recipe comes from "All Recipes"


This famous fudge recipe was changed from Costco's "Cooking in Style" fudge recipe. I used marshmallow cream and almonds to really make this fudge the way I love! The almonds really adds a great texture and flavor to this amazing chocolate fudge.


This two layer fudge is definitely a great combination of chocolate and white fudge! I adapted the divine divinity fudge recipe from Emeril's recipe and fantasy recipe from my father-in-law's. They are both fantastic recipes! While the divinity fudge has a nice, firm texture, the fantasy fudge has a smooth and creamy texture. And surprisingly when they are layered together, every bite is interesting and fabulous!

More recipes are coming your way from "My Fabulous Recipes" Keep checking back for more truffles, cookies, and brownies recipes this week! I'm so excited to share them with you. Sweet holidays!

Sook the Cook

Christmas Treats for you! Let's start out with some Fudge...

This last weekend was just crazy! Let me tell you what I was up to this weekend, starting Friday. So there's something you should know about me. I. Hate. Shopping. You read it right. I really do hate shopping. You'll know I'm telling you the truth when you see my closet. I don't really have a lot of clothes or shoes or cute jewelry. If there is one thing that I don't like about holiday seasons, it would be shopping for Christmas. So I put it off and put it off and finally went to the mall and got some presents for my hub and cub. I don't think I even have any money left for groceries.... I guess we'll just have to eat bread and drink lots of water...


On Saturday, I went and got all the ingredients I needed for treats... This year, I'm not doing gifts for anyone  other than my hub and cub. Well, not "buying" gifts is more correct. So I decided to make treats for friends and family. I must have made about 6 different kinds of treats. I made 10 plateful treats and some more for hub's work. So silly me, I thought making those treats won't be too much work... Boy, was I wrong?? I ended up staying up until 2:30 am finishing up all the stuff! I was exhausted from baking and making fudge and dipping truffles all day and all night! I now have a new respect for bakers. Gosh, I'm not so sure if I will ever be able to bake standing up all day. I'd die!


Okay, no more whining, I promise. Today, I delivered all the plates to my friends and family. Some I barely know, some I'm close with, family with wild teenagers with crazy appetite (they got two plates thank goodness). Just driving around the town delivering the plates took us about 2 hours! Crazy, huh? But I loved it! It was actually my favorite part about all this experience! It was so wonderful to see their faces light up as they saw the treats. It was definitely worth staying up late making all those sweets!

 Today, I would like to share with you some fudge recipes that I made. I made four different kinds. They are super easy to make them. If I'd known how easy it was to make, I would've made it way more often!


Please click on the pictures for printable recipes. These fudges were fantastic! The first recipe, "Peanut Butter Fudge" is amazing in its simplicity of ingredients and directions. The recipe comes from "All Recipes"


This famous fudge recipe was changed from Costco's "Cooking in Style" fudge recipe. I used marshmallow cream and almonds to really make this fudge the way I love! The almonds really adds a great texture and flavor to this amazing chocolate fudge.


This two layer fudge is definitely a great combination of chocolate and white fudge! I adapted the divine divinity fudge recipe from Emeril's recipe and fantasy recipe from my father-in-law's. They are both fantastic recipes! While the divinity fudge has a nice, firm texture, the fantasy fudge has a smooth and creamy texture. And surprisingly when they are layered together, every bite is interesting and fabulous!

More recipes are coming your way from "My Fabulous Recipes" Keep checking back for more truffles, cookies, and brownies recipes this week! I'm so excited to share them with you. Sweet holidays!

Sook the Cook

Christmas Treats for you! Let's start out with some Fudge...

This last weekend was just crazy! Let me tell you what I was up to this weekend, starting Friday. So there's something you should know about me. I. Hate. Shopping. You read it right. I really do hate shopping. You'll know I'm telling you the truth when you see my closet. I don't really have a lot of clothes or shoes or cute jewelry. If there is one thing that I don't like about holiday seasons, it would be shopping for Christmas. So I put it off and put it off and finally went to the mall and got some presents for my hub and cub. I don't think I even have any money left for groceries.... I guess we'll just have to eat bread and drink lots of water...


On Saturday, I went and got all the ingredients I needed for treats... This year, I'm not doing gifts for anyone  other than my hub and cub. Well, not "buying" gifts is more correct. So I decided to make treats for friends and family. I must have made about 6 different kinds of treats. I made 10 plateful treats and some more for hub's work. So silly me, I thought making those treats won't be too much work... Boy, was I wrong?? I ended up staying up until 2:30 am finishing up all the stuff! I was exhausted from baking and making fudge and dipping truffles all day and all night! I now have a new respect for bakers. Gosh, I'm not so sure if I will ever be able to bake standing up all day. I'd die!


Okay, no more whining, I promise. Today, I delivered all the plates to my friends and family. Some I barely know, some I'm close with, family with wild teenagers with crazy appetite (they got two plates thank goodness). Just driving around the town delivering the plates took us about 2 hours! Crazy, huh? But I loved it! It was actually my favorite part about all this experience! It was so wonderful to see their faces light up as they saw the treats. It was definitely worth staying up late making all those sweets!

 Today, I would like to share with you some fudge recipes that I made. I made four different kinds. They are super easy to make them. If I'd known how easy it was to make, I would've made it way more often!


Please click on the pictures for printable recipes. These fudges were fantastic! The first recipe, "Peanut Butter Fudge" is amazing in its simplicity of ingredients and directions. The recipe comes from "All Recipes"


This famous fudge recipe was changed from Costco's "Cooking in Style" fudge recipe. I used marshmallow cream and almonds to really make this fudge the way I love! The almonds really adds a great texture and flavor to this amazing chocolate fudge.


This two layer fudge is definitely a great combination of chocolate and white fudge! I adapted the divine divinity fudge recipe from Emeril's recipe and fantasy recipe from my father-in-law's. They are both fantastic recipes! While the divinity fudge has a nice, firm texture, the fantasy fudge has a smooth and creamy texture. And surprisingly when they are layered together, every bite is interesting and fabulous!

More recipes are coming your way from "My Fabulous Recipes" Keep checking back for more truffles, cookies, and brownies recipes this week! I'm so excited to share them with you. Sweet holidays!

Sook the Cook

Tuesday, October 6, 2009

Halloween Idea #2: Strawberry Ghosts Recipe

There's nothing scarier than pasty white ghosts... My college roommate would agree. We watched "the Grudge" one night and after that, she was scared to sleep with me in the same room because she thought somehow I was going to change in to this pasty white Japanese girl ghost with very black hair (Keep in mind I'm Asian) at night while she was sleeping and make the horrible groaning sound just like the ghost does in "the Grudge". Okay, so maybe these strawberry ghosts aren't nearly as bad as the grudge lady. But pretty close. Just look at the eyes and the mouth... Creeeeeeepy!! :) (I know, they're not scary looking at all. I'm just trying to set the mood for Halloween... he he) For this upcoming Halloween, you should make this delicious treat for your family and friends. A little drop of almond extract makes the white chocolate dip amazing! I seriously couldn't stop eating them. You could make the eyes using minichips, they will probably make much prettier eyes than using melted chocolate chips. But either way, it was fun being able to create these scary strawberry ghosts!

 
Strawberry Ghosts Recipe (adapted from Taste of Home)

Ingredients:
30 fresh strawberries
8 ounces white baking chocolate, chopped
1 teaspoon shortening
1/8 teaspoon almond extract
1/4 cup miniature semisweet chocolate chips (optional for eyes)

Directions:

Wash strawberries and gently pat with paper towels until completely dry. In a microwave-safe bowl, melt white chocolate and shortening at 50% power; stir until smooth. Stir in extract.

Dip strawberries in chocolate mixture; place on a waxed paper-lined baking sheet, allowing excess chocolate to form the ghosts' tails. If using mini chocolate chips for eyes, immediately press chocolate chips into coating for eyes. Freeze for 5 minutes.

In a microwave-safe bowl, melt remaining chocolate chips; stir until smooth. Dip a toothpick into melted chocolate and draw (eyes and) a mouth on each face. Yield: 2-1/2 dozen.


    Halloween Idea #2: Strawberry Ghosts Recipe

    There's nothing scarier than pasty white ghosts... My college roommate would agree. We watched "the Grudge" one night and after that, she was scared to sleep with me in the same room because she thought somehow I was going to change in to this pasty white Japanese girl ghost with very black hair (Keep in mind I'm Asian) at night while she was sleeping and make the horrible groaning sound just like the ghost does in "the Grudge". Okay, so maybe these strawberry ghosts aren't nearly as bad as the grudge lady. But pretty close. Just look at the eyes and the mouth... Creeeeeeepy!! :) (I know, they're not scary looking at all. I'm just trying to set the mood for Halloween... he he) For this upcoming Halloween, you should make this delicious treat for your family and friends. A little drop of almond extract makes the white chocolate dip amazing! I seriously couldn't stop eating them. You could make the eyes using minichips, they will probably make much prettier eyes than using melted chocolate chips. But either way, it was fun being able to create these scary strawberry ghosts!

     
    Strawberry Ghosts Recipe (adapted from Taste of Home)

    Ingredients:
    30 fresh strawberries
    8 ounces white baking chocolate, chopped
    1 teaspoon shortening
    1/8 teaspoon almond extract
    1/4 cup miniature semisweet chocolate chips (optional for eyes)

    Directions:

    Wash strawberries and gently pat with paper towels until completely dry. In a microwave-safe bowl, melt white chocolate and shortening at 50% power; stir until smooth. Stir in extract.

    Dip strawberries in chocolate mixture; place on a waxed paper-lined baking sheet, allowing excess chocolate to form the ghosts' tails. If using mini chocolate chips for eyes, immediately press chocolate chips into coating for eyes. Freeze for 5 minutes.

    In a microwave-safe bowl, melt remaining chocolate chips; stir until smooth. Dip a toothpick into melted chocolate and draw (eyes and) a mouth on each face. Yield: 2-1/2 dozen.


      Halloween Idea #2: Strawberry Ghosts Recipe

      There's nothing scarier than pasty white ghosts... My college roommate would agree. We watched "the Grudge" one night and after that, she was scared to sleep with me in the same room because she thought somehow I was going to change in to this pasty white Japanese girl ghost with very black hair (Keep in mind I'm Asian) at night while she was sleeping and make the horrible groaning sound just like the ghost does in "the Grudge". Okay, so maybe these strawberry ghosts aren't nearly as bad as the grudge lady. But pretty close. Just look at the eyes and the mouth... Creeeeeeepy!! :) (I know, they're not scary looking at all. I'm just trying to set the mood for Halloween... he he) For this upcoming Halloween, you should make this delicious treat for your family and friends. A little drop of almond extract makes the white chocolate dip amazing! I seriously couldn't stop eating them. You could make the eyes using minichips, they will probably make much prettier eyes than using melted chocolate chips. But either way, it was fun being able to create these scary strawberry ghosts!

       
      Strawberry Ghosts Recipe (adapted from Taste of Home)

      Ingredients:
      30 fresh strawberries
      8 ounces white baking chocolate, chopped
      1 teaspoon shortening
      1/8 teaspoon almond extract
      1/4 cup miniature semisweet chocolate chips (optional for eyes)

      Directions:

      Wash strawberries and gently pat with paper towels until completely dry. In a microwave-safe bowl, melt white chocolate and shortening at 50% power; stir until smooth. Stir in extract.

      Dip strawberries in chocolate mixture; place on a waxed paper-lined baking sheet, allowing excess chocolate to form the ghosts' tails. If using mini chocolate chips for eyes, immediately press chocolate chips into coating for eyes. Freeze for 5 minutes.

      In a microwave-safe bowl, melt remaining chocolate chips; stir until smooth. Dip a toothpick into melted chocolate and draw (eyes and) a mouth on each face. Yield: 2-1/2 dozen.


        Sunday, October 4, 2009

        Halloween Idea #1: Marshmallow Witches Recipe

        Watch out for these witches!! Well, these witches are so wicked that you might want to eat them all up! Feel free to do so! They're actually pretty sweet. :) This recipe is incredibly easy and also so fun to make! If you have little kids around, they would probably LOVE to help you out! It could be a fun activity for your entire family. So get your favorite goodies out and start making these scary yet very cute witches for Halloween!


        Marshmallow Witches Re
        cipe
        Print this recipe

        Ingredients

        • 1/2 cup vanilla frosting, divided
        • 36 miniature semisweet chocolate chips
        • 12 large marshmallows
        • 1 drop each green, red and yellow food coloring, optional
        • 1/4 cup flaked coconut
        • 12 chocolate wafers or Keebler fudge shoppe fudge filled cookies
        • 12 miniature peanut butter cups
        • 12 milk chocolate kisses

        Directions

        • For the face of each witch, place a dab of frosting on the bottom of three chocolate chips; press two for eyes and one for nose onto each marshmallow.
        • For hair, combine green food coloring and a drop of water in a small resealable plastic bag; add coconut and shake well. Spread a small amount of frosting on sides of marshmallows; press coconut hair into frosting. Place 3 tablespoons of frosting in a small heavy-duty resealable plastic bag; tint orange with red and yellow food coloring. Set aside.
        • For hats, spread some of the remaining frosting in the center of chocolate wafers (or Keebler cookies); press peanut butter cups upside down into frosting. Lightly spread bottoms of chocolate kisses with frosting; place on peanut butter cups. Cut a small hole in the corner of pastry or plastic bag; insert a small star tip. Fill the bag with frosting and pipe stars around the base of each peanut butter cup. Secure a hat to each witch with a dab of frosting. (Yield: 1 dozen)
        Adapted from "Taste of Home"


        Halloween Idea #1: Marshmallow Witches Recipe

        Watch out for these witches!! Well, these witches are so wicked that you might want to eat them all up! Feel free to do so! They're actually pretty sweet. :) This recipe is incredibly easy and also so fun to make! If you have little kids around, they would probably LOVE to help you out! It could be a fun activity for your entire family. So get your favorite goodies out and start making these scary yet very cute witches for Halloween!


        Marshmallow Witches Re
        cipe
        Print this recipe

        Ingredients

        • 1/2 cup vanilla frosting, divided
        • 36 miniature semisweet chocolate chips
        • 12 large marshmallows
        • 1 drop each green, red and yellow food coloring, optional
        • 1/4 cup flaked coconut
        • 12 chocolate wafers or Keebler fudge shoppe fudge filled cookies
        • 12 miniature peanut butter cups
        • 12 milk chocolate kisses

        Directions

        • For the face of each witch, place a dab of frosting on the bottom of three chocolate chips; press two for eyes and one for nose onto each marshmallow.
        • For hair, combine green food coloring and a drop of water in a small resealable plastic bag; add coconut and shake well. Spread a small amount of frosting on sides of marshmallows; press coconut hair into frosting. Place 3 tablespoons of frosting in a small heavy-duty resealable plastic bag; tint orange with red and yellow food coloring. Set aside.
        • For hats, spread some of the remaining frosting in the center of chocolate wafers (or Keebler cookies); press peanut butter cups upside down into frosting. Lightly spread bottoms of chocolate kisses with frosting; place on peanut butter cups. Cut a small hole in the corner of pastry or plastic bag; insert a small star tip. Fill the bag with frosting and pipe stars around the base of each peanut butter cup. Secure a hat to each witch with a dab of frosting. (Yield: 1 dozen)
        Adapted from "Taste of Home"